Sunday 29 March 2009

S.W.A.L.K


This tutorial was written by me on 29th March 2009
Any similarities to other tutorials are completely coincidental
and unintentional. I try and keep my tutorials as simple as
possible, but they are written assuming you have a good
working knowledge of PSP and Animation Shop


SUPPLIES NEEDED:-


SWALK freebie add on kit from Candy's Treats HERE
You will probably need to go back a few posts to find it
Masks 12 and 190 from Weescotslass HERE
Font of choice. I am using Al Sandra
Two tubes of choice from the same artist. I am using the
artwork of Keith Garvey. You will need a licence to use his work
which you can purchase at MPT HERE

Ready? Then let's get started. Make sure your supplies are open in PSP before you start


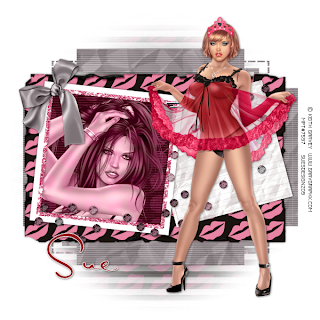
1. Open a new image 600 x 600 and floodfill white. Copy and paste a paper of choice as a new layer. Apply WSL mask 12

2. Copy and paste another paper of choice as a new layer and apply WSL mask 190. Rotate the mask layer to the right by 90. Go to effects and apply Cybia screenworks effect fine rule using the default settings.

3. Copy and paste frame 3 as a new layer and add a small dropshadow. Using your magic wand click inside the square. Go to selections, modify and expand by 10. Copy and paste a paper of choice as a new layer then go to selections, invert and hit delete on your keyboard. Drag this layer beneath the frame layer. Keep selected, and copy and paste one of your tubes as a new layer into the square. Selections, invert and delete. You can now deselect. Change the blend mode on your tube to luminance legacy

4. Copy and paste your other tube as a new layer and place to the right of your tag. Add a small dropshadow

5. Copy and paste the silver bow as a new layer and resize by 30%. Add a dropshadow and sharpen once.

6. Add your name and copyright and your'd done!

Thanks for trying my tutorial

Saturday 28 March 2009

Daylight savings time!

Ugh I hate daylight savings time! Clocks go forward by one hour tonight (well, early hours of this morning) so we lose an hour's sleep in the mornings - and I am so not a morning person :(

Hope everyone is having a great weekend so far!

Hugs, Sue

Sunday 22 March 2009

Hoppy Easter


This tutorial was written by me on 9th March 2009
Any similarities to other tutorials are completely coincidental
and unintentional. I try and keep my tutorials as simple as
possible, but they are written assuming you have a good
working knowledge of PSP and Animation Shop


SUPPLIES NEEDED:-

Hooper Easter scrapkit by Sox of Soxsational Scraps. You can purchase the kit HERE
Mask of choice
Font of choice
Tubes of choice. I am using the artwork of Elias Chatzoudis.
You must have a licence to use his work which you can purchase from HERE

Ready? Then let's get started :)

Have all your supplies open in PSP but minimise for now

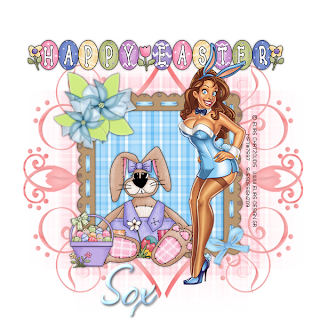
1. Open a new image 600 x 600 and floodfill white. Copy and paste a paper of choice
from the kit as a new layer. New mask layer from image and select the mask of your
choice. Apply the mask and on the layers pallette delete the mask layer. Answer yes
to the box that pops up then ungroup layers

2. Copy and paste one of the frames as a new layer. Resize by 70%. Add a dropshadow. Using your magic wand select inside the frame. Selections, modify, expand by 8. Copy and paste another paper of choice from the kit then go to selections, invert and delete. Drag the paper layer below the frame layer

3. Copy and paste one of the doodles and place at the top left of your tag. Duplicate that layer then go to image and mirror. Duplicate the mirrored layer then go to images and flip. Duplicate the flipped layer then go to images and mirror again. You should end up with a doodle in each corner

4. Copy and paste one of the Happy Easter banners from the kit. Resize as necessary and place at the top of your tag. Now add your tube and place slightly to the right of your tag

5. Add some elements of your choice from the kit. I used a flower, one of the bunnies and an easter basket. When happy with your tag add your name and copyright and save as a png file.

That's it all done! Thanks for trying my tutorial

Soft Kisses


This tutorial was written by me on 24th January 2009
Any similarities to other tutorials are completely coincidental
and unintentional. I try and keep my tutorials as simple as
possible, but they are written assuming you have a good
working knowledge of PSP and Animation Shop


SUPPLIES NEEDED:-

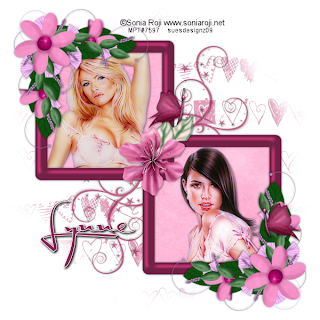
Bee Mine scrapkit by Tracey at Soxsational Scraps. You can purchase the kit HERE
Mask 55 by Enchanted by Darkness which you can download HERE
Template 30 by AquaRebel315 which you can download HERE
Font of choice - I used Satisfaction
Xero porcelain effect (optional)
Two tubes of choice from the same artist. I am using the artwork of Sonia Roji.
You must have a licence to use her work which you can purchase from HERE

Ready? Then let's get started :)


Make sure your mask is minimised in PSP

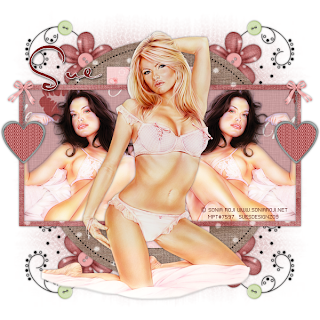
1. Open up the template in PSP. Make a duplicate (shift D) and close the original. Delete the copyright layer, highlight the white background layer and go to image, canvas size and increase canvas size to 600 x 600. You will probably need to floodfill the rest of the canvas white

2. Highlight the white background layer and copy and paste a paper of choice as a new layer. Go to layers, new mask layer from image. Select EBDMask55 from the dropdown and make sure source luminance is checked, then press ok. Highlight the mask layer and delete. Answer yes to the box that pops up. Highlight the layer that says "group", right click on this layer and ungroup layers

3. Highlight raster 3. Go to selections, select all, float and defloat. Keep selected and copy and paste a paper of choice from the kit as a new layer. Go to selections, invert and hit delete on your keyboard. Deselect and give a small dropshadow of 0, 0, 50, 5. Delete the original raster 3 layer

4. Highlight raster 2. Go to selections, select all, float and defloat.
Keep selected and copy and paste a paper of choice from the kit as a new layer. Go to selections, invert and hit delete on your keyboard. Deselect and give a small dropshadow of 0, 0, 50, 5. Delete the original raster 2 layer

5. Highlight raster 1. Go to selections, select all, float and defloat. Keep selected and copy and paste a paper of choice from the kit as a new layer. Go to selections, invert and hit delete on your keyboard. Deselect and give a small dropshadow of 0, 0, 50, 5. DO NOT DELETE THE ORIGINAL LAYER

6.
Highlight copy of raster 1. Go to selections, select all, float and defloat. Keep selected and copy and paste a paper of choice from the kit as a new layer. Go to selections, invert and hit delete on your keyboard. Deselect and give a small dropshadow of 0, 0, 50, 5. DO NOT DELETE THE ORIGINAL LAYER

7. Highlight raster 4. Go to selections, select all, float and defloat. Keep selected and copy and paste a paper of choice from the kit as a new layer. Go to selections, invert and hit delete on your keyboard. Deselect and give a small dropshadow of 0, 0, 50, 5. Delete the original raster 4 layer

8. Highlight copy of raster 4. Go to selections, select all, float and defloat. Keep selected and copy and paste a paper of choice from the kit as a new layer. Go to selections, invert and hit delete on your keyboard. Deselect and give a small dropshadow of 0, 0, 50, 5. Delete the original copy of raster 4 layer

9. Highlight raster 1. Using your magic wand select inside the square. Copy and paste your tube as a new layer, making sure it's above the square paper layer. Position your tube to where you want it then go to selections, invert and hit delete on your keyboard. Deselect and give a small dropshadow of 0, 0, 50, 5. Apply xero porcelain effect with the default settings. You can now delete the original raster 1 layer.

10. Repeat the above step for the other square which will be copy of raster 1

11. Copy and paste your main tube as a new layer. Dropshadow and resize if required. Drag your tube layer to the top of all the other layers

12. Highlight the white background layer and copy and paste flower art 1 as a new layer. Add a dropshadow. Go to layers, and duplicate the flower art layer. Then go to image and mirror. Duplicate this layer then go to image and flip. Duplicate this layer then go to image and mirror. You should end up with one flower art in each corner.

13. Copy and paste one of the hanging hearts as a new layer. Resize by 40% and add a dropshadow. Place in one of the corners of the frame. Go to layers, duplicate then image, mirror.

14. Add the apropriate copyright and your name and you're done!

Thanks for trying my tutorial

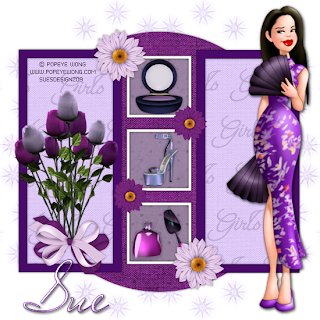
Purple Princess


This tutorial was written by me on 12th March 2009
Any similarities to other tutorials are completely coincidental
and unintentional. I try and keep my tutorials as simple as
possible, but they are written assuming you have a good
working knowledge of PSP and Animation Shop


SUPPLIES NEEDED:-

Template 23 from AquaRebel Designz HERE
About Girls scrapkit from Scrap Dimensions HERE
Font of choice
Mask of choice. I am using one by Sophisticated Simone which you can
get from HERE
Tube of choice. I am using the awesome artwork of Popeye Wong.
You can visit his site HERE

Ready? Then let's get started :)

Open your supplies is psp but minimise for now


1. Open the template. Make a duplicate and close the original. Delete the copyright layer on the copy you just made. Add a new raster layer and send to the bottom but above the white background layer. Copy and paste a paper of choice from the kit and apply a mask of choice

2. Highlight raster 7 on your layers pallette then go to selections, select all, float and defloat. Keep selected and copy and paste a paper of choice as a new layer. Then go to selections, invert and hit delete on your keyboard. Give this layer a small dropshadow and delete the original raster 7 layer

3. Repeat the above step with raster layer 5 and copy of raster layer 5 using a different paper

4. Repeat once more with raster layer 4 using a different paper again

5. Highlight raster 2. Go to selections, select all, float and defloat. Keep selected and floodfill the outlines of the three squares white or another colour of your choice

6. Repeat the above step with raster layer 1 and copy of layer 1 using a dark purple or another colour of your choice

7. Copy and paste your tube as a new layer and position to the right of your tag. Add any other elements that you wish - I dotted a few flowers around the tag and one of the bows but you can use any you like

8. When happy with your tag add your name and copyright, and save as a png file

Thanks for trying my tutorial.

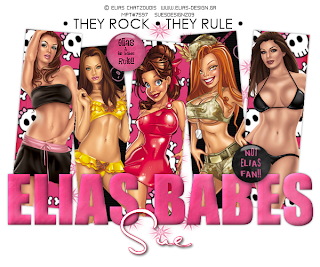
Elias Babes Rock


This tutorial was written by me on 10th March 2009
Any similarities to other tutorials are completely coincidental
and unintentional. I try and keep my tutorials as simple as
possible, but they are written assuming you have a good
working knowledge of PSP and Animation Shop

SUPPLIES NEEDED:-

Template 176 from Divine Intentionz HERE
Elias Fan Buttons also from Divine Intentionz
Girls Rock Too scrapkit by Missy at Misfits Scrapz HERE
Font of choice
Mask of choice
Five tubes from Elias Chatzoudis.
You must have a licence to use his work which you can purchase from HERE

Ready? Then let's get started :)

Have all your supplies open in PSP but minimise for now

1. Open the template. Make a duplicate and close the original. Delete the copyright layer

2. Copy and paste a paper of choice from the kit as a new layer and send to the bottom
of the layers but above the white background. Apply a mask of choice and ungroup layers

3. Highlight rectangle 5 on your layers pallette and using your magic wand select inside the
rectangle. Go to selections, select all, float and defloat. Keep selected and copy and paste a
paper of choice as a new layer. Go to selections, invert and hit delete on your keyboard. Select none. Highlight rectangle 5 again (the grey rectangle not the paper one). Copy and paste one of the tubes as a new layer then go to selections, invert and hit delete on your keyboard. Move the tube layer above the paper rectangle layer

4. Repeat the above step with the remaining rectangles using different tubes

5. Highlight the Elias Babes wordart layer. Go to selections, select all, float and defloat. Copy and paste a paper of choice as a new layer then go to selections, invert and hit delete on your keyboard. Add a dropshadow and an inner bevel of your choice

6. Add a couple of the Elias fan buttons as new layers and any other elements if you wish

7. When happy with your tag add your name and copyright and then save as a png file

Thanks for trying my tutorial.


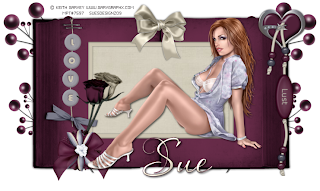
Love or Lust?


This tutorial was written by me on 9th March 2009
Any similarities to other tutorials are completely coincidental
and unintentional. I try and keep my tutorials as simple as
possible, but they are written assuming you have a good
working knowledge of PSP and Animation Shop


SUPPLIES NEEDED:-

Love or Lust scrapkit by Bluey of BlueDream Designs. You can obtain the kit HERE
Font of choice
Tubes of choice. I am using the artwork of Keith Garvey
You must have a licence to use his work which you can purchase from HERE

Ready? Then let's get started :)

Have all your supplies open in PSP but minimise for now


1. Open the love or lust book frame from the kit. Add a new raster layer and floodfill white

2. Using your magic wand select inside the frame and go to selections, modify and expand by 8.
Copy and paste a paper of choice into the frame and go to selections, invert and hit delete on your keyboard. Drag the paper layer below the frame layer

3. Add your tube as a new layer, placing it inside the frame so it's half in and half out. A laying down tube would work best with this tutorial

4. Copy and paste the ornament as a new layer and place at the top left of your tag. Duplicate that layer and then go to image and mirror

5. Add any elements of your choice. I used some of the flowers, a couple of bows and one of the lust beads

6. When you're happy with your tag add your name and copyright and save as a png file

That's it all done - thanks for trying my tutorial and remember you can post your results
on the appropriate thread

Happy Mother's Day!

Hi everyone :)

Well it's Mother's Day here in the UK so I'd like to wish you all a very happy Mother's Day, and I hope you all get thoroughly spoiled as you deserve!

Hugs, Sue

Sunday 15 March 2009

That's all folks!

Phew that's it for today folks, I'm absolutely knackered and now I have to go and do some ironing, otherwise me and hubby won't have any work clothes for tomorrow!

I hope everyone has had a fantastic weekend, and I will be back later on during the week with some more tuts :)

Hugs for now, Sue

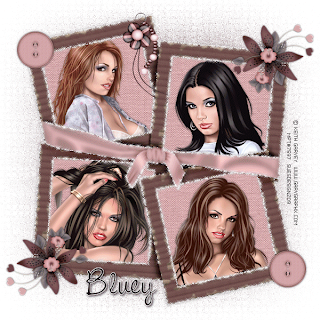
Garvs Beauties


This tutorial was written by me on 24th January 2009
Any similarities to other tutorials are completely coincidental
and unintentional. I try and keep my tutorials as simple as
possible, but they are written assuming you have a good
working knowledge of PSP and Animation Shop

SUPPLIES NEEDED:-

Dreamer scrapkit from Bluedream Designs HERE
Mask 55 from Enchanted by Darkness HERE (contained in zip 6)
Xenofex constallation (optional)
4 tubes of choice from the same artist. I used the gorgeous artwork
of Keith Garvey. You must have a licence to use his work which you can
purchase HERE. Please do not use the same tubes if you do not hold a licence!


This one is quite long winded but it's not as difficult as it sounds!

Ready? Then let's get started :)

Make sure your mask is minimized in PSP


1. Open a new image 600 x 600 and floodfill white. Copy and paste a paper of choice
from the kit as a new layer. Go to layers, new mask layer from image. Select EBDMask55
from the dropdown and apply, making sure source luminance is checked. On the layers pallette
delete the mask layer and answer yes to the box that pops up. Then highlight the layer that says
"group", right click and ungroup layers. Resize the mask layer by 105%. Then go to effects, texture effects, mosaic glass with the following settings:-

Columns and rows - 50
Glass curvature & edge curvature - 0
Grout width - 5
Grout diffusion - 45
Symmetric checked

2. Copy and paste BD Dreamer frame 4 as a new layer. Resize by 90% and add
a small dropshadow of 0, 0, 50, 5

3. Hold down the shift key, then using your magic wand select inside all the
areas of the frame. Go to selections, modify and expand by 10. Keep selected.
Copy and paste a paper of choice as a new layer then go to selections, invert and hit
delete on your keyboard. Deselect and drag below the frame layer

4. Highlight the frame layer and using your magic wand select inside the first
square of the frame. Selections, modify and expand by 5. Keep selected and
copy and paste one of your tubes. Position inside the frame then go to selections,
invert and hit delete on your keyboard. Repeat this step for the other three
squares using different tubes from the same artist. Drag the frame layer above
the tube layers. Merge the four tubes together and add a dropshadow

5. Copy and paste BD Dreamer flower 6 as a new layer. Resize by 70% and add
a dropshadow. Place in one of the corners of your frame. Duplicate the flower layer and
place go to image, mirror, image flip

6. Copy and paste BD Dreamer pendant as a new layer. Resize by 40% and add
a dropshadow. Place at the top of your tag and use your eraser tool to carefully
erase part of the metal ring so it looks as though the pendant is looped over the frame

7. Copy and paste one of the buttons as a new layer. Resize by 30% and add a
dropshadow. Place in the corner of the frame. Duplicate the button and place the
second one in the other corner

8. Add your name and copyright. If you are going to animate your tag follow the
instructions below, if you are not then you are now finished and can save your tag as
a PNG file


TO ANIMATE:-

1. Duplicate your frame layer twice so you have a total of three frames. Rename them frame 1,
frame 2 and frame 3.

2. On frame 1 apply xenofex constellation with the following settings:-

Star size 2.00
Size variation 43
Edge star density 50
Overall star density 0
Overdrive 88
Twinkle amount 100
Twinkle rotation 45
Keep original image
Random seed 1

3. On frame 2 apply the same settings but hit the random seed button once

4. On frame 3 apply the same settings again but hit the random seed button once

5. Hide frames 2 and 3. With frame 1 highlighted go to edit, copy merged and paste into
animation shop as a new animation

6. Back in PSP hide frame 1 and unhide frame 2. Making sure frame 2 is highlighted go to
edit, copy merged. In animation shop go to edit, paste after current frame

7. Back to PSP again and hide frame 2 and unhide frame 3. With frame 3 highlighed go to
edit, copy merged. In animation shop go to edit, paste after current frame

8. View your animation in animation shop and save as a GIF file

That's it all done!

Thanks for trying my tutorial
Hearts & Flowers


This tutorial was written by me on 14th January 2009
Any similarities to other tutorials are completely coincidental
and unintentional. I try and keep my tutorials as simple as
possible, but they are written assuming you have a good
working knowledge of PSP and Animation Shop


SUPPLIES NEEDED:-

All About Love scrapkit by Lynne at Baby Cakes Scraps which you can purchase HERE.
Mask 133 by Wee Scots Lass HERE
Font of choice - I used Al Sandra
Xero porcelain effect (optional)
Tube of choice. I am using the artwork of Sonia Roji.
You must have a licence to use her work which you can purchase from HERE

Ready? Then let's get started :)


1. Open a new image 600 x 600 and floodfill white

2. Copy and paste BCS double frame as a new layer and resize by 80%.
Colorize to match one of the papers that you will be using. Add a small
dropshadow

3. Using your magic wand, select inside all areas of the frame (hold down the shift
key while using your magic wand and that way you will be able to select inside more
than one area at a time). Go to selections, modify and expand by 10. Copy and paste
BCS pink paper as a new layer then go to selections, invert and hit delete on your
keyboard. Deselect and drag the paper layer below the frame layer

4. Highlight the white background layer. Copy and paste BCS glitter overlay as a new
layer. Apply your mask and then merge group. Lower the opacity of the mask layer to
around 40 or 50%

5. Highlight the frame layer. Using your magic wand select inside one of the squares. Go to
selections, modify and expand by 10. Copy and paste your tube as a new layer, then go to
selections, invert and hit delete on your keyboard. Drag the tube below the frame layer and
give it a small dropshadow

6. Repeat the above step with the other square using a different tube of the same artist. Make sure both your tube layers are below your frame layer. Merge the two tube layers together then apply xero porcelain effect with the default settings

7. Copy and paste BCS floral cluster two as a new layer. Resize as necessary and apply a small dropshadow. Place at the top left of your tag just on the frame. Go to image, mirror and flip so the second floral cluster should be at the bottom right of your tag.

8. Copy and paste BCS blossom with leaves as a new layer. Resize as necessary and give a small dropshadow. Place this in the middle of your tag - see mine for placement

9. Add any other elements you wish from the scrapkit - I added some butterflies and one of the doodles

10. Add your name and copyright and that's it!

Thanks for trying my tutorial :)

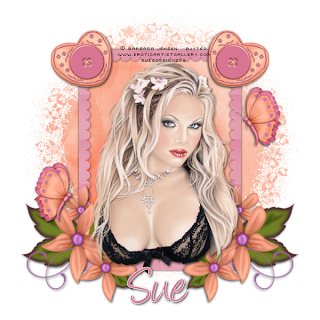
Peach Blush


This tutorial was written by me on 20th December 2008.
Any similarities to other tutorials are completely coincidental
and unintentional. I try and keep my tutorials as simple as
possible, but they are written assuming you have a good
working knowledge of PSP and Animation Shop


SUPPLIES NEEDED:-

Sheer Delight scrapkit from Baby Cakes Scraps HERE. This is a PTU kit
Mask of choice.
Font of choice
Tube of choice. I am using the artwork of Barbara Jensen. You must have a
licence to use her work which you can purchase from HERE

Ready? Then let's get started :)


1. Open a new image 600 x 600 and floodfill white

2. Copy and paste the plain frame as a new layer. Resize by 40% and rotate right by 90.
Add dropshadow 1,1, 40, 4 and then again but changing it to -1, -1, 40 4. Colourize to match
your tube/scrapkit

3. Copy and paste your tube as a new layer and add dropshadow of choice

4. Copy and paste one of the flowers as a new layer. Resize by about 80% and place
at the bottom right of the frame. Add a small dropshadow. Duplicate the flower and
go to image, mirror

5. Select inside the frame layer using your magic wand. Copy and paste a paper of choice as
a new layer, then go to selections, invert and delete. Move the paper beneath the frame layer

6. Highlight your white background layer and copy and paste a paper of choice as a new layer.
Apply a mask of your choice, resizing that layer if necessary

7. Copy and paste one of the heart buttons as a new layer. Resize as necessary and place at the
top left of your frame. Add a small dropshadow. Duplicate the heart button layer and go to
image and mirror

8. Copy and paste one of the butterflies as a new layer, resizing as necessary. Give the
butterfly a small dropshadow. Duplicate the butterfly and place where required on your
tag

9. Add your name and copyright and that's it, all done!

Thanks for trying my tutorial
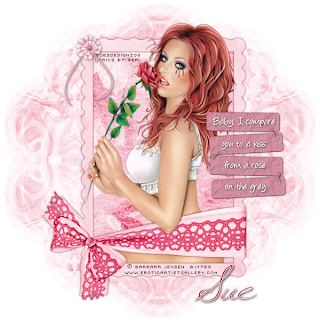
Kiss From A Rose


This tutorial was written by me on 13th December 2008.
Any similarities to other tutorials are completely coincidental
and unintentional. I try and keep my tutorials as simple as
possible, but they are written assuming you have a good
working knowledge of PSP and Animation Shop


SUPPLIES NEEDED:-

Butterflies scrapkit from Baby Cakes Scraps HERE. This is a PTU kit
Mask of choice. I am using one from www.zuzzana.dk
Font of choice
Tube of choice. I am using the artwork of Barbara Jensen. You must have a
licence to use her work which you can purchase from HERE

Ready? Then let's get started :)


1. Open a new image 600 x 600 and floodfill white

2. Copy and paste a frame of choice from the scrapkit as a new layer. Resize as necessary and give it a small dropshadow. Colourize to match a colour from your tube

3. Using your magic wand select inside the frame layer. Go to selections, modify and expand by 8. Keep selected and copy and paste a paper of choice as a new layer. Selections, invert and hit delete on your keyboard. Deselect and move below your frame layer. Dropshadow and colourize as before

4. Copy and paste your tube as a new layer. Duplicate your tube and place one above and one below your frame layer. Now you need to erase the parts of your tube that you don't need - see my tag for reference.

5. Copy and paste the journal tag as a new layer and place to the right of your tag on the frame layer. Resize as necessary and colourize and dropshadow as before. Type some text onto the journal tag layer - I used song lyrics from Seal - the song is called Kiss From A Rose. Add a small dropshadow to your text

6. Highlight the white background layer and copy and paste another paper of choice
as a new layer. Colourize as before. Apply a mask of choice to that layer

7. Add your name and copyright and you're done!

Thanks for trying my tutorial

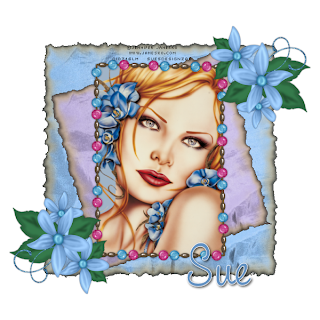
Janesko Blues

This tutorial was written by me on 13th December 2008
Any similarities to other tutorials are completely coincidental
and unintentional. I try and keep my tutorials as simple as
possible, but they are written assuming you have a good
working knowledge of PSP and Animation Shop


SUPPLIES NEEDED:-

Pretty One scrapkit from Baby Cakes Scraps HERE. This is a PTU kit
Alien Skin Burnt Edges
Font of choice
Tube of choice. I am using the artwork of Jennifer Janesko. You must have a
licence to use her work which you can purchase from CILM


Ready? Then let's get started :)

1. Open a new image 600 x 600 and floodfill white

2. Copy and paste the blue satin paper (or a paper of choice if using a different kit)
as a new layer. Resize by 70% and apply alien skin burnt edges with the settings
0, 15.37 and 1

3. Copy and paste the purple satin paper (or paper of choice) as a new layer. Resize by
55%, rotate left by 15 and add the same burnt edges effect that you applied to the first paper

4. Copy and paste the bead frame and resize by 55%. Add a small dropshadow to this layer

5. Using your magic wand select inside the bead frame layer. Go to selections, modify and expand by 8. Keep selected and add a new raster layer. Floodfill this new layer with a colour from your tube and deselect. Move the floodfill layer beneath the bead frame layer

6. Using your magic wand aelect inside the bead frame layer again. Go to selections, modify and expand by 8. Copy and paste your tube as a new layer then go to selections, invert and delete. Move your tube beneath the bead frame layer and give it a small dropshadow

7. Copy and paste a flower from the scrapkit as a new layer, resize as necessary and place at the bottom left of your tag. Give it a small dropshadow. Duplicate the flower layer and go to image, mirror and then flip so it should be at the top right of your tag

8. Add your name and copyright and any other elements you wish and that's it - all done!

Thanks for trying my tutorial


Watercolour Kidd


SUPPLIES NEEDED:-

Mask 31 by butterflyflutterby from
http://butterflyflutterbycreations.blogspot.com

Scrap kit of choice or the one I used called Watercolors by Lynne of Babycakes scraps
which you can purchase at
http://babycakesscraps.blogspot.com

Tube of choice. I am using the artwork of Jamie Kidd. You must have a licence to use her
work which you can purchase from
CILM

Font of choice. I am using Scriptina

Ok, let's get started!!

Open your supplies in PSP and minimize for now J

1. Open a new image 600 x 600 and flood fill white

2. Copy and paste a paper of choice as a new layer. Go to layers, new mask layer from image and
select mask 31. Apply the mask and merge group

3. Copy and paste frame 3 as a new layer. Add a small drop shadow

4. Using your magic wand select inside the frame. Selections, modify and expand by 8.
Keep selected. Add a new raster layer and flood fill that layer with a pale colour from
your tube. Deselect and move beneath your frame layer

5. Copy and paste your tube as a new layer. Add a dropshadow and delete the bottom
part of the tube that overhangs the frame

6. If you are using the same kit as I am, copy and paste bcs floral ribbon as a new layer. Resize by 60% and add drop shadow . Place at the bottom of your frame

7. Copy and paste bcs beads as a new layer. Resize by 60% and add the same dropshadow.
Place at the bottom of your tag on top of the floral ribbon

8. Copy and paste bcs butterfly. Resize by 40% and add a dropshadow. Place on your
tag where you are happy with it

9. Add your name, copyright and any text you wish and save as a png file

Thanks for trying my tutorial

Sweet & Sinful


This tutorial was written by me on 6 November 2008.
Any similarities to other tutorials are completely coincidental
and unintentional. I try and keep my tutorials as simple as
possible, but they are written assuming you have a good
working knowledge of PSP and Animation Shop


SUPPLIES NEEDED:-

Funky Scrapkit which you can download at
http://simplysensationalscraps.blogspot.com/
Mask 17 which you can download at
http://butterflyflutterbycreations.blogspot.com/
Font of choice
2 tubes of choice (one close up and one sitting/laying down would work best) I am
using the artwork of Keith Garvey. You must have a licence to use his work which
you can purchase from
MPT

OK, let's begin!

Open your supplies in PSP and minimize them for now

1. Open a new image 600 x 600 and floodfill white. Copy and paste frame 6 as a new layer
onto your canvas and add a small dropshadow

2. Using your magic wand select inside the frame. Selections, modify, expand by 8. Keep selected. Copy and paste paper 8 as a new layer. Selections, invert and hit delete on your keyboard. Move the frame layer above the paper layer

3. Select inside the frame again using the magic wand. Selections, modify and expand by 8. Keep selected. Copy and paste your close up tube as a new layer. Selections, invert and hit delete on your keyboard. Lower the opacity of your tube slightly

4. Hide the white background layer and merge visible the remaining layers. Resize by 90% and sharpen once

5. Copy and paste your second tube as a new layer and give it a dropshadow of choice

6. Copy and paste paper 7 as a new layer and place at the bottom of your other layers, but above the white background. Go to layers, new mask layer from image and select mask 17. Apply this mask and merge group. Give this mask layer a small dropshadow and lower the opacity to around 50%

7. Copy and paste heartcharm 2 as a new layer and resize by 50%. Add a small dropshadow and place where you are happy with it

8. Copy and paste flower 4 as a new layer and resize by 15%. Add a small dropshadow and place just at the top of your heartcharm, just in the middle (see mine for placement)

9. Add your name and copyright and that's it!!

Thanks for trying my tutorial
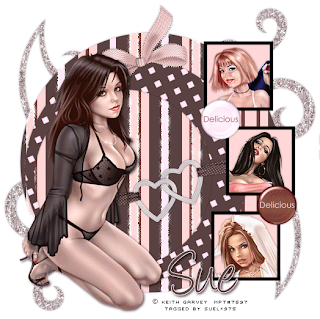
Chocomallow Cutie


This tutorial was written by me on 22 October 2008.
Any similarities to other tutorials are completely coincidental
and unintentional. I try and keep my tutorials as simple as
possible, but they are written assuming you have a good
working knowledge of PSP and Animation Shop


YOU WILL NEED:-

Template 62 by Missy which you can get HERE
Chocomallow scrapkit from Misfitsscrapz HERE
Four tubes of choice (one main and three for the smaller squares. I am
using artwork by Keith Garvey. You will need a licence to
use his artwork which you can purchase HERE.
Please do not use the same images unless you have a licence

OK, let's get started :)

1. Open all your supplies in PSP and minimize for now. Open template 62,
make a duplicate and close the original

2. Highlight circle 1 layer. Selections, select all, float, defloat. Keep selected.
Copy and paste paper 6 as a new layer. Selections, invert and delete.
Deselect and add a small dropshadow

3. Highlight circle 2 layer. Selections, select all, float, defloat. Keep selected.
Copy and paste paper 4 or another paper of choice as a new layer. Selections,
invert and delete. Deselect and add the same dropshadow

4. Highlight the frame layer, and using the magic wand select inside the top square.
Selections, modify, expand by 4. Keep selected. Copy and paste a tube and when
happy with placement go to selections, invert and delete. Deselect

5. Follow step 4 above for the remaining two squares using different tubes.
Merge the three tube layers together and add a dropshadow

6. Highlight the frame background layer. Using your magic wand select inside
the three squares. Selections, modify, expand by 3. Keep selected. Add a new raster
layer and floodfill with a pale colour to compliment your tube and the scrapkit. Deselect

7. Add your main tube now, resizing as necessary and add a dropshadow.
Add a few elements of your choice and your name and copyright

TO ANIMATE:-

1. Make two copies of your circle 1 layer so you end up with three circles.
Rename them circle 1, circle 2 and circle 3

2. On circle 1 layer use your magic wand to select random stripes of the paper.
Keep selected then add xenofex constellation with the following settings:-

Star size - 2.00
Size variation - 51
Edge star density - 63
Overall star density - 0
Overdrive - 100
Twinkle amount - 47%
Twinkle rotation 45
Keep original image
Random seed 1

DO NOT DESELECT YET!!

2. Highlight circle 2 layer - your stripes should still be selected. Add
xenofex constellation again with the same settings but hit the random
seed button once.

3. Still with your stripes selected, highlight layer 3.
Add xenofex again but hit the random seed button again.
You can now deselect

4. Hide your circle layers 2 and 3, and highlight circle 1. Edit, copy merged
and paste into animation shop (AS) as a new animation

5. Back in PSP, hide circle 1 and unhide circle 2. Make sure circle 2 layer is
highlighted and go to edit, copy merged and in AS go to edit, paste
after current frame

6. Back in PSP again hide circle 2 and unhide circle 3. Make sure circle
3 layer is highlighted and edit, copy merged. Back in AS go to edit and paste
after current frame

7. View animation and save as a GIF file

Thanks for trying my tutorial :)

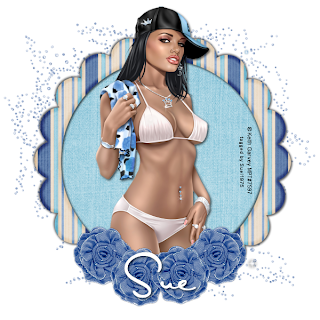
Denim Beauty


This tutorial was written by me on 21 October 2008.
Any similarities to other tutorials are coincidental and
completely unintentional. I try to keep my tutorials as simple
as possible but they are written assuming you have a good
working knowledge of PSP and Animation Shop.


You will need:-

Denim Chic scrapkit by Clarey's Designz which you can download HERE
Font of choice. I used Al Sandra
Tube of choice. I am using the awesome artwork of Keith Garvey.
You will need a licence to use his work which you can purchase HERE
Please do not use the same image unless you hold a licence

Ready? Then let's get started!

1. Open a new image 600 x 600 and floodfill white

2. Copy and paste scalloped frame 1 from the kit as a new layer. Give this
a small dropshadow of choice

3. Using your magic wand select inside the frame. Go to selections, modify, expand
by 4. Keep selected and copy and paste a paper of choice from the kit as a new
layer. Go to selections, invert and hit delete on your keyboard. Select none and drag
the paper layer below the frame layer. Merge the paper and frame layers together
and resize by 90%

4. Copy and paste your tube as a new layer. When happy with the placement add
a dropshadow

7. Copy and paste one of the flowers from the kit as a new layer and resize by 40%. Add
a dropshadow. Duplicate until you have four flowers and then arrange them at the
bottom of your tag

8. Copy and paste the sparkledust as a new layer. Drag this layer to the bottom of
your layers pallette but make sure it's above the white background layer. Resize by
95%

9. Add any other elements you wish to your tag, along with your name and the appropriate
copyright. Save as a png file and you're done!

Thanks for trying my tutorial. If you would like to show me your
results and have them posted on my blog please feel free to send them to me
by email

Hi!

Hi there, hope everyone is having an awesome weekend! Just thought I'd post a little note here to let you all know that my tuts will be posted as soon as possible. I'm just in the process of moving them all over here and getting everything set up the way I want it, then I hope to have some new tuts up too!

Hugs, Sue