This tutorial was written by me on 9th March 2009
Any similarities to other tutorials are completely coincidental
and unintentional. I try and keep my tutorials as simple as
possible, but they are written assuming you have a good
working knowledge of PSP and Animation Shop
SUPPLIES NEEDED:-
Hooper Easter scrapkit by Sox of Soxsational Scraps. You can purchase the kit HERE
Mask of choice
Font of choice
Tubes of choice. I am using the artwork of Elias Chatzoudis.
You must have a licence to use his work which you can purchase from HERE
Have all your supplies open in PSP but minimise for now
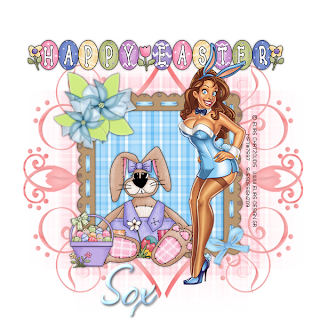
1. Open a new image 600 x 600 and floodfill white. Copy and paste a paper of choice
from the kit as a new layer. New mask layer from image and select the mask of your
choice. Apply the mask and on the layers pallette delete the mask layer. Answer yes
to the box that pops up then ungroup layers
2. Copy and paste one of the frames as a new layer. Resize by 70%. Add a dropshadow. Using your magic wand select inside the frame. Selections, modify, expand by 8. Copy and paste another paper of choice from the kit then go to selections, invert and delete. Drag the paper layer below the frame layer
3. Copy and paste one of the doodles and place at the top left of your tag. Duplicate that layer then go to image and mirror. Duplicate the mirrored layer then go to images and flip. Duplicate the flipped layer then go to images and mirror again. You should end up with a doodle in each corner
4. Copy and paste one of the Happy Easter banners from the kit. Resize as necessary and place at the top of your tag. Now add your tube and place slightly to the right of your tag
5. Add some elements of your choice from the kit. I used a flower, one of the bunnies and an easter basket. When happy with your tag add your name and copyright and save as a png file.
That's it all done! Thanks for trying my tutorial


No comments:
Post a Comment