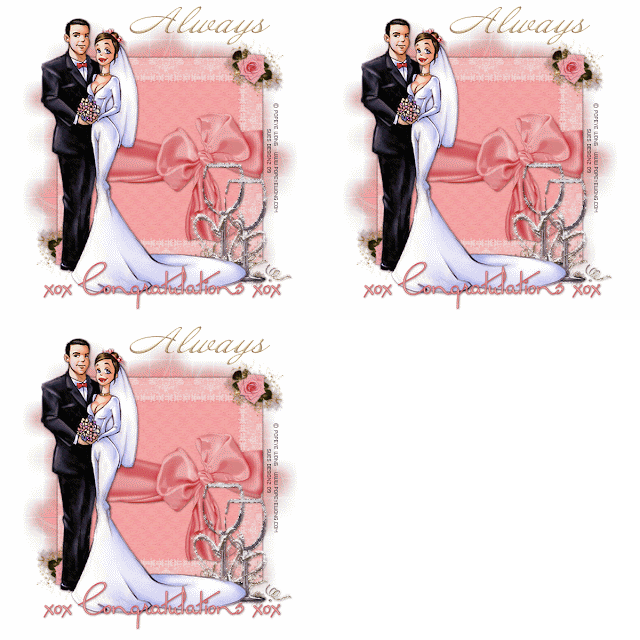
OK, so the other day I was looking for a nice wedding tag and realised I haven't got any - hence this tutorial today! I'm really pleased with the way it came out and I adore this scrapkit! Click on the tag so you can see the animation too :)
This tutorial was written by me on 26th April 2009.
Any similarities to other tutorials are completely coincidental
and unintentional. I try and keep my tutorials as simple as possible
but they are written assuming you have a good working knowledge of
PSP and Animation Shop
SUPPLIES NEEDED:-
For the Love of Romance scrapkit by Lynne at BabyCakes Scraps.
You can purchase this HERE
Tube of choice. I am using a gorgeous tube by Popeye Wong -
it's a freebie too! You can find it HERE
Mask of choice or the one I am using - mask 84 by Weescotslass HERE
Font of choice - I am using Miss Lankfort
Ready? Let's go!
1. Open a new image 600 x 600 and floodfill white
2. Copy and paste paper 14 as a new layer. Apply the mask and add a small dropshadow to this layer
3. Copy and paste paper 7 as a new layer. Resize as necessary and add the same dropshadow
4. Copy and paste your tube as a new layer and place where happy.
5. Copy and paste the glasses as a new layer. Resize as necessary and add a small dropshadow. Place at the bottom right of your tag. Duplicate the glasses layer twice so you should have three glass layers in total
6. On the first glass layer add Alien Skin Constellation with the following settings:-
2.00, 43, 50, 0, 88, 100 - make sure keep original image is selected
7. On the second glass layer add the same constellation settings but hit the random seed button once
8. On the third layer add constellation with the same settings but again hit the random seed button once
9. Add any other elements of choice, your copyright and text
TO ANIMATE:-
1. Hide glass layers 2 and 3. Go to edit, copy merged and paste as a new animation into animation shop
2. Back in psp, hide glass layers 1 and 3 and unhide glass layer 2. Edit, copy merged and in animation shop go to edit and paste after current frame
3. Back in psp, hide glass layers 1 and 2 and unhide glass layer 3. Edit, copy merged and in animation shop go to edit and paste after current frame
4. View your animation and save as a gif file
Thanks for trying my tutorial :)


No comments:
Post a Comment