Sunday, 17 May 2009

I got another award :)


I got this award from JustJo-Aussie Nut
Thank you so much for thinking of me :)
The rules say I must pass this on to ten other blogs so here goes (with apologies for any repetitions!)

Chica of Chica's Designz
Noeleen of Designs by Irish Lass
Sapphire of Sapphire's Splendour
Dee of Little Mama Dee's PSP Tuts
Monique of Monique's Corner of Creations
Dawn of Dawn's Artistic Creationz & Ramblings
Denny of Denz Designz
Marcia of Babes Designz
Julie of Julie's Creationz
Tammy of Tammy's Scraps

post signature

Monday, 11 May 2009

My first 1000 hits!

WOOHOO!!!

I made it just past my first 1000 hits - I know that's just a drop in the ocean compared to some blogs but the feeling you get when you see that little counter go up is soooooo good! Remember if you do drop by please leave me a shout out - I'd love to hear from you all :)

post signature

Sunday, 10 May 2009

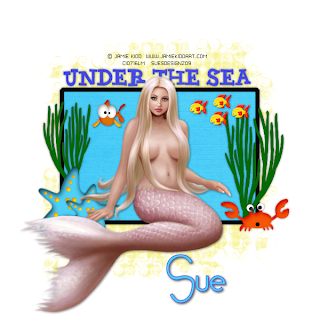
Under the Sea


Another tutorial for you this weekend - not sure where my mojo has suddenly appeared from but hoping it sticks around for a while longer!

This tutorial was written by me on 10th May 2009. Any similarity to other tutorials is completely coincidental and unintentional. I try to keep my tutorials as simple as possible but they are written assuming you have a good working knowledge of PSP and Animation Shop

SUPPLIES NEEDED:-

Template 7 from Melissa's Creationz
Helen Moore scrapkit from Bel Vidotti - part of the friendship collection
Mask 258 from Weescotslass
Font of choice - I am using noir et blanc from Dafont.com
Tube of choice. I am using the artwork of Jamie Kidd. You will need a licence to use her work which you can purchase from CILM

Ready? Then let's get started.

Open your supplies in PSP and minimise for now

1. Duplicate the template and close the original. Delete the copyright layer. Add a new raster layer and floodfill white. Send to the bottom of your other layers. Highlight this white layer and copy and paste one of the papers from the kit as a new layer. Apply the mask and ungroup the layers

2. Highlight the rectangle frame layer. Go to selections, select all, float and defloat and floodfill black. Deselect and add a small dropshadow

3. Highlight the rectangle layer and go to selections, select all, float and defloat. Copy and paste paper 4 as a new layer then go to selections, invert and hit delete on your keyboard. Add a small dropshadow and delete the original rectangle layer

4. Highlight the seaweed layer and go to selections, select all, float and defloat and floodfill a dark green colour. Add the same dropshadow

5. Highlight the wordart layer and go to selections, select all, float and defloat. Copy and paste paper 5 as a new layer then go to selections, invert and hit delete on your keyboard. Add the same dropshadow and delete the original wordart layer

6. Add a selection of elements from the kit. I deleted the sea urchin and starfish layers and replaced them with the starfish and crab from the kit. I also added a few fish

7. Add your name and copyright and that's it - all done!

Thanks for trying my tutorial
post signature

Saturday, 9 May 2009

Gentle Touch


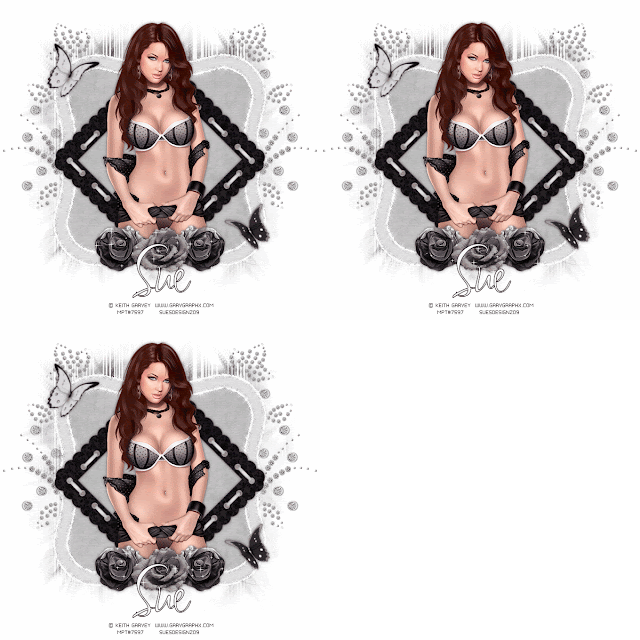
Well what can I say?! Don't mean to blow my own trumpet but I am so pleased with the way this came out - it's a very long winded tut but so worth the result in my humble opinion lol. Click on the tag to get the full effect of the animation :)

This tutorial was written by me on 9th May 2009. Any similarities to other tutorials are completely coincidental and unintentional. I try to keep my tuts as simple as possible but they are written assuming you have a good working knowledge of PSP and Animation Shop

SUPPLIES NEEDED:-

Silver Shadow Scrapkit by Simply Sensational Scraps
Mask 249 by Weescotslass
Alien Skin constellation (optional)
VM Natural sparkle (optional)
Font of choice. I am using Inspiration ROB
Tube of choice. I am using the awsome artwork of Keith Garvey
You will need to purchase a licence from MPT to be able to use
his work

Ready? Then let's get started

Open your supplies in PSP and minimise for now

1. Open a new image 600 x 600 and floodfill white. Copy and paste paper 9 as a new layer. Apply the mask and ungroup layers

2. Copy and paste frame 8 as a new layer. Add a small dropshadow and resize by 80%. Using your magic wand select inside the frame and go to selections, modify and expand by 8. Copy and paste paper 20 as a new layer then go to selections, invert and hit delete on your keyboard

3. Copy and paste frame 3 as a new layer and resize by 70%. Add a small dropshadow and rotate 45 to the right. Copy and paste your tube as a new layer and dropshadow

4. Copy and paste one of the flowers. Resize by 40% and add a small dropshadow. Copy and paste a few more of the flowers and arrange at the bottom of your tag. Merge the flowers together

5. Copy and paste one of the doodles as a new layer and drag to the bottom of your other layers but above the white background layer. Duplicate and mirror

6. Add a few other elements of choice. I just added some butterflies but the choice is yours :). At this stage add your name and copyright as well

7. Duplicate the merged flowers layer so you have three in total. Rename them flower 1, flower 2 and flower 3. Duplicate the bracket frame layer so you have three in total and rename them bracket 1, bracket 2 and bracket 3

8. On flower 1 layer add VM natural sparkle filter with the following settings:-
12, 255, 255, 255, 255 and random seed 44.
Add the same settings to flower 2 but with random seed 45. Add the same settings to flower 3 but with random seed 46

9. On the bracket 1 layer add Alien Skin constellation filter with the following settings:-
2.42, 100, 100, 0, 100, 49. Twinkle rotation 45, keep original image and random seed 1
Add the same settings to bracket 2 but hit the random seed button once
Add the same settings to bracket 3 but hit the random seed button once more

TO ANIMATE:-

1. Hide bracket layers 2 and 3, and flower layers 2 and 3. Then go to edit and copy merged. Paste into animation shop as a new animation

2. Back in PSP, hide bracket layer 1 and unhide bracket layer 2. Hide flower 1 and unhide flower 2. Edit, copy merged and in AS go to edit and paste after current frame

3. Back in PSP, hide bracket layer 2 and unhide 3. Hide flower 2 and unhide flower 3. Go to edit and copy merged and in AS go to edit and paste after current frame

View animation and save as a GIF file

Thanks for trying my tutorial

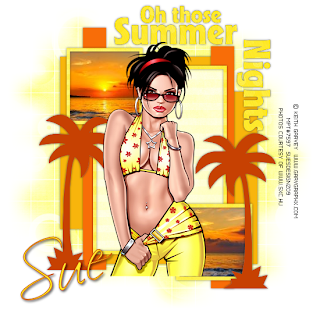
Summer Nights


Browsing through loads of blogs yesterday and came across Melissa's Creationz
Well she has some amazing templates on there and as soon as I saw this one I had to make a tut using it - Grease is one of my favourite films and I would love to see the musical version of it. Maybe one day!

This tutorial was written by me on 8th May 2009.
Any similarities to other tutorials are completely
coincidental and unintentional. I try to make
my tutorials as simple as possible but they are
written assuming you have a good working knowledge
of PSP and Animation Shop


SUPPLIES NEEDED:-

Template 52 from Melissa's Creationz HERE
Sunny Days scrapkit from Bel Vidotti HERE
Mask 84 from Weescotslass HERE
2 sunset images - mine are from www.sxc.hu
Font of choice - I am using Scriptina
Tube of choice - I am using the artwork of Keith Garvey.
You must have a licence to use his work which you can
purchase from MPT HERE

Ready? Then let's go!

Open your supplies in PSP and minimise for now
Oh, and apologies for this one, I was all over the place making it! It seems a little long winded but it's a nice easy tut

1. Make a duplicate of the template and close the original. Delete the copyright layer. Highlight the square frames layer and using your magic wand select inside the top square. Then go to selections, modify and expand by 2. Copy and paste one of the sunset images as a new layer then go to selections, invert and hit delete on your keyboard. Repeat this step with the bottom square and when finished drag the square frame layer above the sunset images

2. Highlight the square frame layer again. Go to selections, select all, float and defloat. Copy and paste paper 5 as a new layer then go to selections, invert and hit delete. Add a small dropshadow and then delete the original square frame layer

3. Copy and paste your tube as a new layer and add a small dropshadow. When happy with the placement X it out for now while you work on the rest of your tag

4. Highlight the wordart layer. Go to selections, select all, float and defloat. Copy and paste paper 2 as a new layer then go to selections, invert and hit delete. Add a small dropshadow and delete the original wordart layer

5. Repeat the above step on the rectangle layer using paper 6

6. Repeat again on the rectangle frame layer using paper 2

7. Repeat for the dotted line layer using paper 5. I colourized my paper using hue 34 and saturation 255

8. On the narrow rectangles layer go to selections, select all, float and defloat. Floodfill with a dark orange colour from your sunset image

9. On the background square layer do the same again but using a lighter orange colour from the sunset image

10. Do the same for the palm trees layer, using a dark orange again

11. Add a new raster layer and send this to the bottom of all your other layers. Copy and paste paper 9 as a new layer and apply the mask. Ungroup layers and resize the mask by 110%

12. Add your name and copyright and that's it, all done!

Thanks for trying my tutorial

post signature

Sunday, 3 May 2009

Beautiful Dreams


This tutorial was written by me on 29th April 2009.
All similarities to other tutorials are completely
coincidental and unintentional. I try to keep my tuts
as simple as possible bu they are written assuming
you have a good working knowledge of PSP and Animation
Shop


SUPPLIES NEEDED:-

Lilac Dreams Scrapkit from Simply Sensational Scraps HERE
SG cornered octagon mask from Essex Girl HERE
Font of choice - I am using Inspiration ROB
Tube of choice. I am using the artwork of Anthony Guerra
You must have a licence to use his work which you can
purchase from CILM HERE


Ready? Then let's get started :)

Open your supplies in PSP and minimise for now

1. Open a new image 600 x 600 and floodfill white. Copy and paste paper 1 as a new layer. Apply the mask and ungroup layers

2. Copy and paste one of the lace frames as a new layer. Resize by 90% and add a small dropshadow

3. Use your magic wand to select inside the frame then go to selections, modify and expand by 10. Copy and paste paper 11 as a new layer then go to selections, invert and hit delete on your keyboard. Drag the paper layer below your frame layer

4. With the frame layer still selected copy and paste your tube and place inside the frame. When happy with placement go to selections, invert and hit delete on your keyboard. Change the blend mode to luminance legacy and lower the opacity to around 55%. Deselect

5. Copy and paste your tube again but position to the left of your tag, or wherever happy. Add a small dropshadow. X out your main tube layer for the moment so you can see where you're working

6. Copy and paste the leaves as a new layer, resizing by 50%. Add a small dropshadow. Duplicate the leaves a few times and arrange them at the bottom of your tag. Copy and paste a selection of the flowers, resizing as necessary, and arrange them on top of the leaves. Unhide your main tube layer and drag to the top of all the other layers

7. Add any other elements of your choice. Add your name and copyright and save as a PNG file

That's it all done! Thanks for trying my tutorial :)

post signature